There are a lot of exciting things going on in the CEREC world. The CEREC Omnicam, CEREC 4.2 and the upcoming e.max abutment block are all very exciting things. But as an Implantologist, I am still in awe of the whole concept of CEREC Guide. As CEREC users we are used to same-day dentistry. People are busy, we know that. Being able to fix a patient’s broken cusp in about an hour is huge to them. CEREC Guide is a way to mill out surgical stents for placing implants guided, chairside. There is no other system in the world that provides dentists with the accuracy of guided implant surgery, while the patient waits. Now a patient can break an entire tooth off at the gumline, and walk out of my office with an implant and possibly, a CEREC temporary, in about an hour.
To do CEREC Guide you need 3 things besides a warm body with a missing tooth. You need a CEREC Guide block set, which includes two CEREC Guide blocks and two reference bodies (will explain later). You will need some thermoplastic tray material (which makes up most of the guide), and a Guided surgery key set, compatible with your implant system.
First, we need to evaluate what type of implant we are placing. A conventional implant involves placing an implant in a healed ridge, very straightforward. An immediate implant involves extracting a patient’s tooth and placing an implant and possibly temporizing this patient. This is a bit more complicated. In CEREC Guide we use something called a reference body. This gizmo does two things. It contains radiographic markers, known as fiducial markers, that help Sirona GALILEOS determine where our implant will be planned in space. The second function of the reference body is to make an indentation into the thermoplastic tray material, which will be milled in CEREC. We want to use the largest reference body we can fit passively into the edentulous space.
After the implant is diagnosed, we then take an impression for the model the CEREC Guide will be made on. I have my assistants take an alginate, then pour it in a PVS die material called Mach 2. You can use stone, but I like this material as it does not break and sets up in about a minute. Thermoplastic tray material is heated in boiling water until its malleable and adapted to the Mach 2 model. Then the reference body is pushed into this material and cooled.
The thermoplastic tray material and the reference body are placed back in the mouth and the patient is then scanned in GALILEOS. After the scan is done, the patient is then scanned in CEREC. Information is exported out of CEREC as a .ssi file and combined with the GALILEOS data.
After an implant is planned, the data is sent back into CEREC at the mill preview as a CEREC Guide file (.cmg .dxd) and goes straight to the mill preview. CEREC milled an insert known as the drill body to fit the indentation made by the reference body.
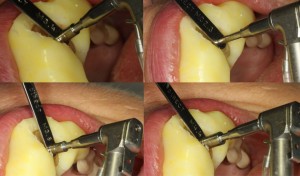
Keys that are specific to the implant system you use are then placed into the guide and the implant osteotomy is drilled.Sirona makes keys for four systems (Straumann, Nobel, Astra and 3I) and I make keys for Implant Direct and Zimmer.

After the osteotomy is drilled, the guide is then removed and the implant is placed. The case can be temporized or not, based on the clinical situation and the surgeon’s skill.
After a period of time, the case can be restored as the clinician sees fit. In the example below, #8 was placed with CEREC Guide and restored with a Zirconia abutment and an e.max crown. All this proves that CEREC is the most versatile piece of equipment in dentistry, the possibilities that the future holds are endless!
For more information, visit http://digitalenamel.com/


Can this guide-system be used for totally edentulous patient? #2 THE ZIRCONIA ABUTEMENTS , are they fabricated in series or you r supposed to place a special order to get them . THANKS